Age Range: First time using external devices for the micro:bit
The MakeCode editor has a dedicated tab to making music and sounds with the micro:bit. Using the external sound cable, students will learn the basics of how the music tab works and how sounds can be produced from the micro:bit.
Aims
Gain a basic understanding of the music tab in the MakeCode editor.
Create music using the micro:bit and external sound cable.
Download the Code
MakeCode Editor
Click the button below to download the MakeCode editor code for this lesson. The hex file is contained in a zip folder.
Kindly refer to our download the code page for instructions on how to upload your code onto the micro:bit. Please use instructions set A.
- MicroUSB Cable - 1 x Connector Cable - 1 x Headphones/Speakers
Preparation
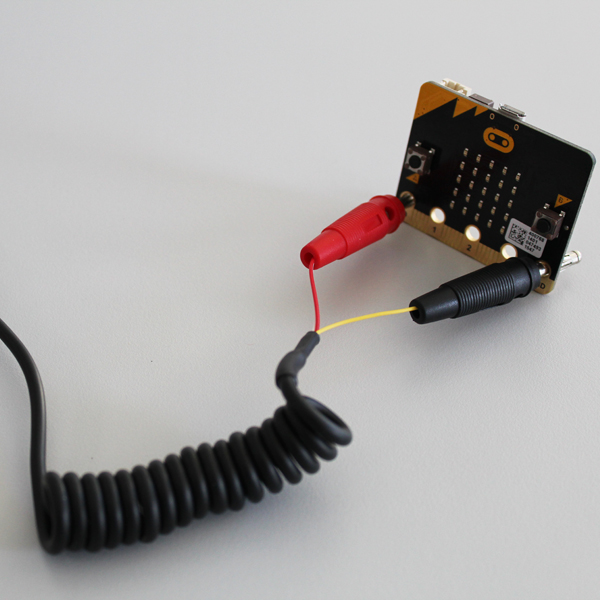
Connect the sound cable to the micro:bit. Red connector to P0, black connector to GND
Plug the headphones or speakers into the other end of the sound cable.
Connect the micro:bit to a computer via the microUSB cable.
Go to the MakeCode website on your computer and open a new project.
Time to Code
As you go through these steps please note that there are images of the completed code to the right.
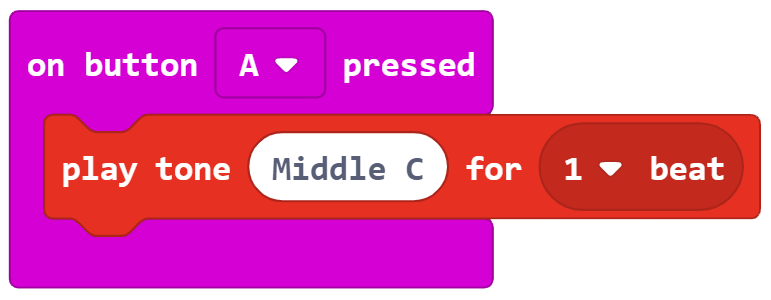
Firstly select the ‘on button pressed’ block from the ‘inputs’ tab and select button A from the drop down. Students should be familiar with this block by now.
Next, go into the ‘music’ tab and select the ‘play tone’ block. Insert this into the ‘on button pressed’ input. By default, middle C is the tone selected but feel free to change this. Leave the default, 1 beat.
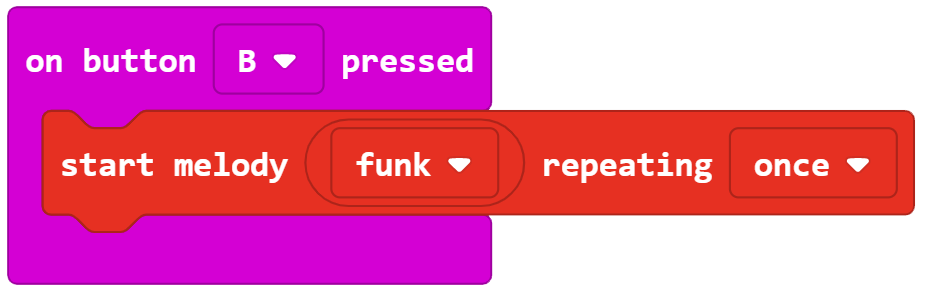
Then, select another ‘on button pressed’ block from the ‘inputs’ tab. This time choose button B from the drop down.
Open the ‘music’ tab again and select the ‘start melody’ block. Insert this into the ‘on button pressed B’ input. Choose any of the melody options from the drop down but leave the repeat to once.
The code is now finished! Download the code and upload it onto the micro:bit. The instructions for this can be found on the download the code page. Please use instructions set B.
What Will Happen
When button A is pressed a tone will play through the headphones for 1 beat. When button B is pressed a melody will play once.
Taking it Further
Explore the ‘music’ tab further and experiment with other blocks available.
Use the skills learned to help complete the more advanced control lessons.
Keep in Touch
We would love to keep in touch with you and as a result aid you along your digital making journey.
Becoming a digital maker subscriber means you will receive exclusive offers and we will keep you up to date with new resources and kits, as well as upcoming events and workshops.