Soil Moisture
Overview
Age Range: 9 – 13 years old
Students will investigate how different species of plants react to differing levels of moisture in their soil. This investigation will be completed in a visual way, with students regularly monitoring the health of the different plants over the course of a couple of weeks. Students will work in groups of 2 or 3 and record their findings into a table format. The groups will explain their findings to other students and discuss. Students may note that results are vary between groups. They should discuss this and suggest possible explanations. (A reason could be that students placed their moisture sensors into different parts of the soil).
Download the Code
MakeCode Editor
Click the button below to download the MakeCode editor code for this lesson. The hex file is contained in a zip folder.
Kindly refer to our download the code page for instructions on how to upload your code onto the micro:bit. Please use instructions set A.
This code can also be uploaded into the MakeCode editor.
Aims
- Learn how different species of plants react to different moisture levels in their soil.
- Discuss and understand why results can vary between groups.
Kit Required for the Sensor
Micro:bit

Mini Innovation Board

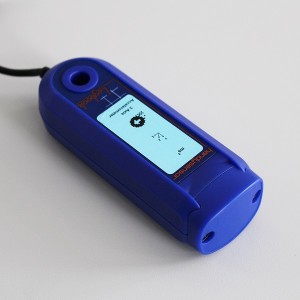
Moisture Sensor
- MicroUSB Cable
- Battery Pack
- 1 x Connector Cable
- 2 x AAA Batteries
- Minimum of 3 Different Species of Plant
REMEMBER, WATER AND ELECTRONICS DO NOT WORK WELL TOGETHER. ENSURE THAT WATER DOES NOT COME INTO CONTACT WITH THE MICRO:BIT OR OTHER ELECTRONIC PARTS.
Preparation
- Connect the micro:bit to the Mini Innovation board via the edge connector.
- Use the connector cables to connect the moisture sensor to ADC1 on the Mini Innovation board.
- Connect the micro:bit to a computer via the microUSB cable.
- Download the code for this investigation and upload it onto the micro:bit. Go to the top of this page for more details. Once the code has been uploaded unplug the micro:bit from the computer and connect the external battery pack. Students should test their devices to check the code has uploaded onto the micro:bit correctly. When button A is pressed the micro:bit LED matrix will display a moisture reading 0-100%. Try the moisture sensor in air and in water. In air the reading should be very low and in water should read between 90 and 100%.
- Download the soil moisture worksheet.
- Set up a minimum of 3 different species of plant onto a table. Record the names of the plants into the worksheet provided.
Activity
- Begin by writing the date on the worksheet provided next to ‘reading 1’. If the plan is to take multiple readings in the same day then also record the time.
- Go to the first plant. Before the moisture level is taken, a score of 1-10 should be given to the plant depending upon its appearance. 1 would represent the plant being almost if not dead and 10 being fully alive. Using the worksheet provided, record this reading in the ‘reading 1’ row and in the first column under the correct species of plant.
- Next, students should place the moisture sensor into the plant. Push the sensor into the soil until the silver surface is buried, but no further than the max insertion depth line.
- Press button A on the micro:bit. This will display the percentage reading of the moisture level of the soil.
- Using the worksheet provided, record this reading into the ‘reading 1’ row and in the second column under the correct species of plant.
- Repeat this process for all species of plants.
- At this point there may be some early signs as to the moisture requirements of the different species of plants.
- Now repeat this process for a further 7-11 readings. The more readings taken the easier the results will be to evaluate. It is recommended to take one reading per day.
- Throughout the investigation, plants should be watered once they become dry and look as though they require water.
Taking it Further
- Conduct an investigation into how different species of plants use water. Water the plants with set amounts of water and see how they react.
Keep in Touch
We would love to keep in touch with you and as a result aid you along your digital making journey.
Becoming a digital maker subscriber means you will receive exclusive offers and we will keep you up to date with new resources and kits, as well as upcoming events and workshops.