Age Range: First time using external devices for the micro:bit
In this lesson students will learn how to control a servo motor using the micro:bit. They will use knowledge gained in previous lessons to use inputs to control the position of the servo motor.
Aims
Learn how a servo motor works and how it can be controlled.
Learn how to add extension tabs to the MakeCode editor.
Download the Code
MakeCode Editor
Click the button below to download the MakeCode editor code for this lesson. The hex file is contained in a zip folder.
Kindly refer to our download the code page for instructions on how to upload your code onto the micro:bit. Please use instructions set A.
Connect the micro:bit to the Mini Innovation board via the edge connector.
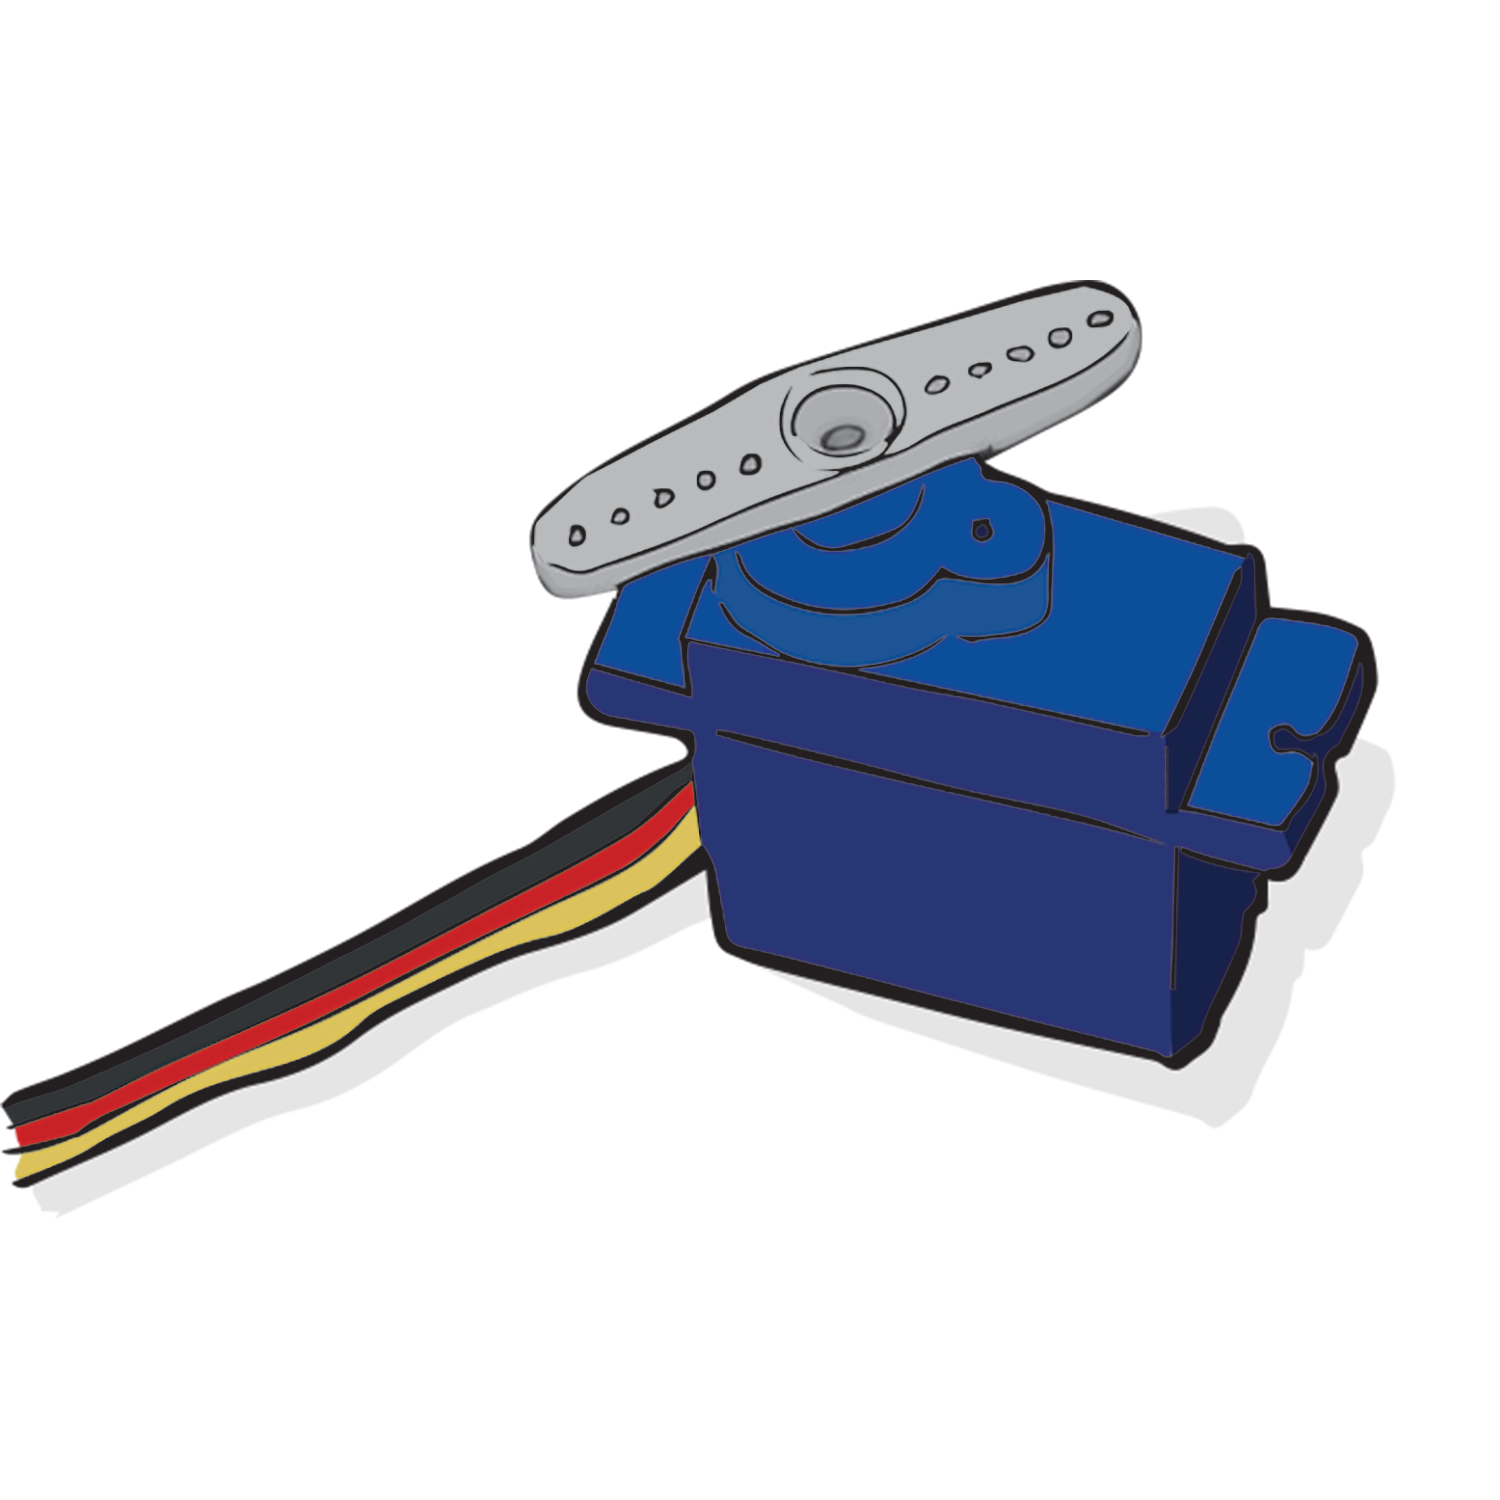
Connect the servo motor to the ADC1 connector on the Mini Innovation Board.
Connect the micro:bit to a computer via the microUSB cable.
Go to the MakeCode website on your computer and open a new project.
Time to Code
As you go through these steps please note that there are images of the completed code to the right.
Firstly, add the servo extension to the MakeCode editor. This can be done by selecting ‘add extensions’ and searching for ‘servos’. Add this extension by selecting it from the list.
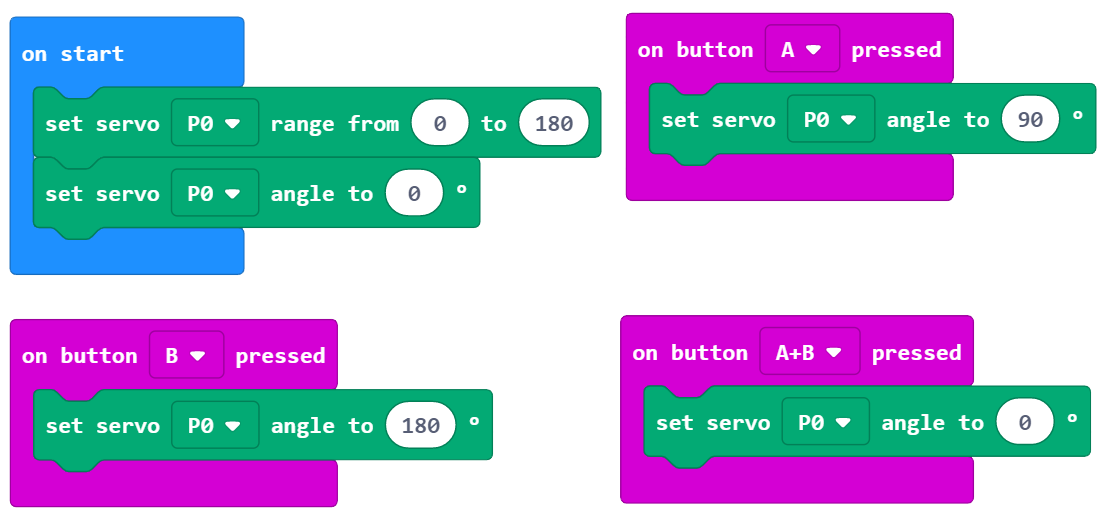
Next, set the angle range of the servo motor. (The servo motor provided in the Control Kit has a 180 degree range of motion). Do this by first adding the ‘on start’ block from the ‘basic’ tab. Then, select the ‘set servo range’ block from the ‘servos’ tab and insert it into the the ‘on start’ block. Set the range from 0 to 180 degrees.
Set the servo to a starting point by selecting the ‘set servo angle’ block from the ‘servos’ tab attaching it underneath the ‘set servo range block’. Choose P0 from the first drop down and input 0 degrees for the angle.
Using the three button press options on the micro:bit; A, B and A+B, use them to move the servo motor to different positions.
Select the ‘on button press’ block from the ‘inputs’ tab and choose A from the drop down.
Next, select another ‘set servo angle’ block from the ‘servos’ tab and insert it into the ‘on button pressed’ block. Choose P0 from the drop down and change the angle to 90 degrees.
Create an ‘on button pressed B’ and ‘on button pressed A+B’ with the angles 180 and 0 degrees respectively.
The code is now finished! Download the code and upload it onto the micro:bit. The instructions for this can be found on the download the code page. Please use instructions set B.
What Will Happen
When the micro:bit is first powered the servo motor will set to 0 degrees. If button A is pressed the servo motor will move to 90 degrees. If button B is pressed it will move to 180 degress. If buttons A+B are pressed together then the servo motor will return to the starting position of 0 degrees.
Taking it Further
Explore other blocks available in the ‘servos’ tab.
Use the skills learned to help complete the more advanced control lessons.
Keep in touch
We would love to keep you up to date with all of our latest news, offers and new products.
If you would like to subscribe to our mailing list please click the button below.