Buzzer Balance
Overview
Age Range: 9 – 13
Students will combine a sensor input with an external output to create a game that tests hand to eye coordination and balance. They will build on knowledge gained in previous Foundation Kit lessons to program the micro:bit’s on-board accelerometer and the external speaker.
The game uses the on-board accelerometer as a balancing tool to see how steady the users’ hands are whilst walking. If the micro:bit is tilted to far in one direction the speaker will make a noise. Students should see if the they can walk between set targets as fast as possible without tilting the micro:bit too far. Think of it as an egg and spoon race suppliment.
The students will be required to work with variables, IF statements and logic throughout this lesson. If they wish, students can take the task further and create an on/off switch using variable states.
Aims
- Begin to program inputs and outputs to work in conjunction with each other.
- Build on previous coding knowledge.
Download the Code
MakeCode Editor
Click the button below to download the MakeCode editor code for this lesson. The hex file is contained in a zip folder.
Kindly refer to our download the code page for instructions on how to upload your code onto the micro:bit. Please use instructions set A.
This code can also be uploaded into the MakeCode editor.
Kit Required
Micro:bit

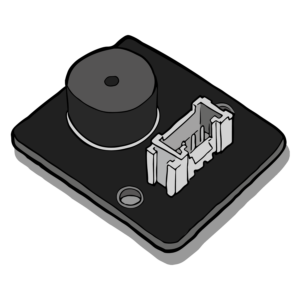
Mini Innovation Board

Speaker
- MicroUSB Cable
- 1 x Connector Cable
Preparation
- Connect the micro:bit to the Mini Innovation board via the edge connector.
- Connect the speaker to the ADC1 connector on the Mini Innovation board with Connector Cable.
- Connect the micro:bit to a computer via the microUSB cable.
- Go to the MakeCode website on your computer and open a new project.
Time to Code
- Insert a ‘forever’ block into the work space. All code created as part of this game will be contained inside this forever loop. Therefore, the code is continuous whilst the micro:bit is powered.
- Next, a variable needs to be created for the accelerometer sensor input. Open the ‘variables’ tab and ‘make a new variable’. Name this variable ‘x’ and select ‘Ok’.
- 3 new blocks will now appear in the ‘variables’ tab. Select the ‘set x to’ block and insert it into the ‘forever’ block.
- Open the ‘input’ tab and add the ‘acceleration (mg)’ block into the ‘set x to’ variable block. Leave the drop down selection as x. A variable has now been created using the x axis of the on-board accelerometer sensor.
- The next step is to create an IF statement to ask the question; ‘if the accelerometer is between the defined parameters do something, else do something else’. In other words, if the micro:bit is tilted outside of the defined range then something will happen.
- First, select the ‘if, else’ block from the ‘logic’ tab. Insert this underneath the variable in the code.
- Next, the question needs to be created. Select the ‘and’ block from the ‘logic tab and insert into the ‘if’ block. This block requires two parameters to be set in the IF statement.
- The first parameter is the low point of the range. Select the ‘greater/less than’ block from the ‘logic’ tab and insert it into the first space in the ‘and’ block. Select the ‘x’ variable block from the ‘variables’ tab and insert this into the first space in the ‘greater/less than’ block.
- Change the drop down to the ‘equal to or greater than’ symbol. Then, type ‘-300- into the the second space in the ‘greater/less than’ block.
- Copy the ‘greater/less than’ block and insert it into the second space in the ‘and’ block. Change the drop down option to the ‘equal to or less than’ symbol. Next, type ‘300 into the second space in the block.
- The question created is, if the acceleration equal to or greater than -300 and equal or less than 300.
- To complete the code the answers to the if statement question need to be added.
- To begin, if the statement is true the micro:bit should show a smiley face on the LED matrix. To do this, select the ‘show leds’ block from the ‘basic tab and insert it inside the ‘if’ statement block, underneath the question. Create a smiley face on the block by selecting the individual leds.
- Next, if the question is false the speaker should play a melody and the LED matrix should show a sad face.
- Select the ‘start melody’ block from the ‘music tab’ and insert inside the else section. Change the drop down option to ‘jump down’.
- Then, select another ‘show leds’ block from the ‘basic’ tab and insert underneath the ‘start melody’ block.
- The if statement is now coded. If the accelerometer stays between -300 and 300 then a smiley face will display on the LED matrix. If not a melody will play through the speaker and a sad face will show on the LED matrix.
- Finally, select a ‘pause’ block from the ‘basic’ tab and insert this underneath the entire if statement. Change the pause to 10 ms. This ensures the forever loop has time pause before it begins again.
- The code is now finished! Download the code and upload it onto the micro:bit. The instructions for this can be found on the download the code page. Please use instruction
What Will Happen
When the micro:bit is powered the game will start. If the micro:bit is kept steady and in between the parameters of -300 and 300 then a smiley face will display on the LED matrix. If not, the speaker will play a melody and the sad face will display on the LED matrix.
Taking it Further
- Customise the game. Change what happens when the parameters are met and not.
- Make the game more difficult. Students can adjust the parameters to change the difficulty of the game. The closer the parameters are together the harder the game will be. For instance, if the parameters are -100 and 100, the micro:bit can only be tilted a very small amount before it exceeds the parameters.
- Build an on/off switch into the game. This code is available at the top of this page in the ‘Download the Code’ section. Instructions on how to create the code are coming soon.
Keep in touch
We would love to keep you up to date with all of our latest news, offers and new products.
If you would like to subscribe to our mailing list please click the button below.
Contact Us

ScienceScope Limited
Downside School
Stratton-on-the-Fosse
Radstock
BA3 4RJ
enquiries@sciencescope.uk